9.3
Backgrounds
One of the hardest things to
control when shooting birds in your yard is the background. If,
for example, you happen to live across the street from a disco club,
then you may have to deal with many of your photos having neon colors
in the background. Even neighboring houses can mar an image by
introducing rectilinear shapes into the background (even if they’re
largely out of focus). I’ve actually found the red of neighboring
brick buildings to sometimes introduce very nice colors into my
backgrounds, though some postprocessing in Photoshop is often necessary
to eliminate any unnatural shapes.
There are several ways to manipulate the backgrounds
of your yardbird photos. Of course, in the field you’d have the
option of changing the angle by moving your camera, but if you’re
shooting out through a window in your home the angles available to you
will generally be more constrained. For small subjects such as
hummingbirds, you can hang a large sheet of fabric behind the
feeder or behind a commonly-used perch; as long as the backdrop is far
enough back from the bird to be rendered out-of-focus, a reasonably
aesthetic effect may be achieved for shallow-DOF photos.
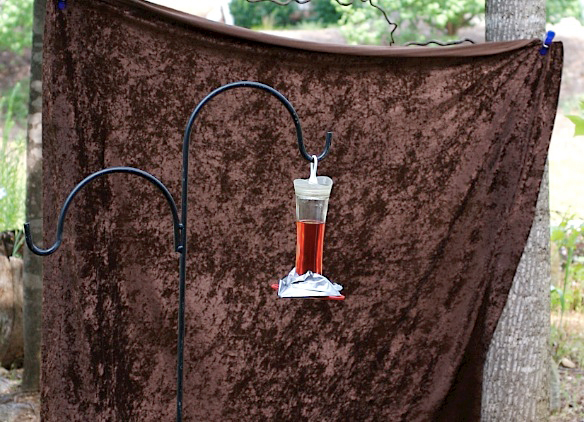
Fig. 9.3.1 :
If you know where the bird is going to be (such as at a feeder or
on a popular perch), you can control the background by hanging a
backdrop.
Solid colors tend to look monotonous and unnatural, though this is less
true for
some velvet-like fabrics like the one pictured above.
In the figure above, I’ve draped a large sheet of
velvet-textured fabric between two trees. Notice the fairly
extreme nonuniformity in the coloration of the backdrop, due to texture
and lighting effects; fabrics with similar degrees of complex variation
can produce more interesting backgrounds than simple colored fabrics,
since they mimic the nonrepetitive complexity of many surfaces
encountered in nature. Spending an hour browsing at your local
textiles outlet should turn up some interesting possibilities.
Just keep in mind that different fabrics will respond differently to
flash (if you happen to be a flash user).
Another interesting possibility for obtaining
artificial backgrounds for bird photography is to visit your local
hunting supply shop and browse through their selection of camouflage
tents and similar products. For the top image in the figure
below, the background was achieved via use of a portable hunting “blind”—really just a large piece of
camouflage fabric draped between two trees—that I bought for about $10
at Dick’s Sporting Goods.
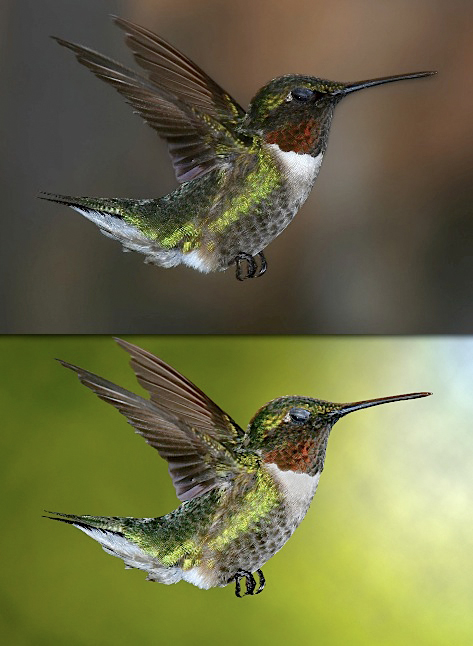
Fig.
9.3.2 : If you don’t like the background, you can replace it
in Photoshop. Top: the original image; the background pattern
was created by a camouflage backdrop draped behind the bird.
Bottom: the resulting image after replacing the background in
Photoshop. The new background was taken from an out-of-
focus shot of a forest, obtained specifically for this purpose.
The bottom portion of the above figure shows the
image that resulted when I replaced the background in Photoshop.
This powerful postprocessing technique is described in detail in Part
III of this book. For the present discussion, simply note several
things: first, that changing the background can radically change the
overall impact of the image; second, that changing the background via
software can be manually less laborious than trying to do so via the
hanging of backdrops (and affords greater control over color dynamics);
and finally, that backgrounds cloned in via software are infinitely
less constrained, since you can get them from literally anywhere.
Even if your yard affords a fairly diverse array of
aesthetic backgrounds, a bit of manipulation in postprocessing can be
useful when shooting yardbirds. In the figure below, the top
image features a fairly good background, in my opinion: it’s got some
nice color, features a bit of subtle texture, and lacks any obvious
anthropogenic (i.e., man-made) artifacts. Compare this to the
bottom portion of the same figure.
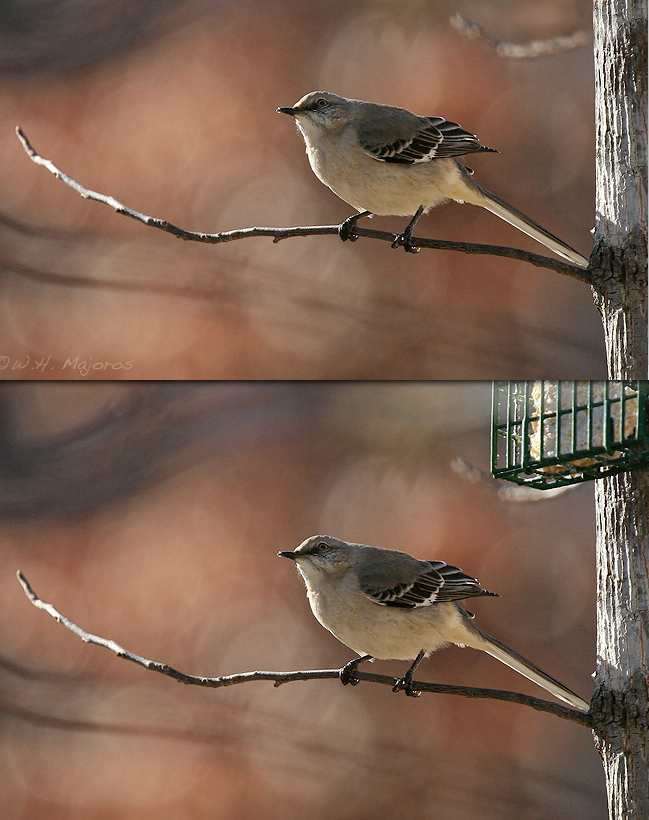
Fig. 9.3.3 :
Sometimes the background is good enough, but there are man-made objects
you’d like to get rid of. Two minutes in Photoshop is all that
was required to erase this
suet feeder (bottom image), producing a more natural looking scene (top
image).
In the bottom portion of the above figure, you can
see the suet cage that I edited out when producing the top image in the
figure. This editing took about three minutes in Photoshop, using
the clone tool (see Chapter
11). Basically, the clone tool allows you to rapidly copy
textures from one part of the image to another. In this case, I
copied some of the tree texture from the lower part of the tree to the
region occluded by the suet cage. I similarly painted in some
background texture from another part of the image onto the leftmost
portion of the suet cage. This example merely serves to show that
relatively minor defects in backgrounds can be corrected in postprocess
using powerful software such as Photoshop (or similar programs); in
many cases, these corrections can be achieved, by the experienced user,
in no more than a few minutes. A similar example is illustrated
below.
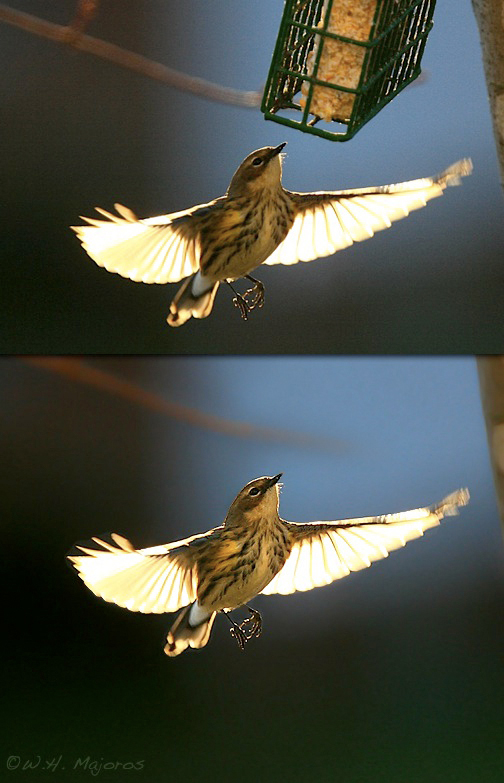
Fig. 9.3.4 :
Another example of erasing man-made objects from the scene.
In this case, the resulting image also appears more dramatic, because
all
attention is focused on the bird in flight. (The bottom image has
also been
processed to reduce noise, and to lighten the bird’s underside).
In the above
example I’ve again cloned out the suet cage to produce a more “naturalistic” image; I’ve also reduced the
noise a bit via Photoshop’s noise-reduction filter, and brightened the
bird’s ventral side via Photoshop’s “highlights and shadows” tool. There are two things
to note about the corrected image shown above. First, while the
second image may appear more dramatic than the first, it’s not as
apparent in the second image what the bird is actually doing; in the
top image, it’s clear that the bird is coming in for a landing on the
suet feeder. Second, if you look at the tree branch and trunk in
both images, you’ll notice that they seem more “faded” in the bottom image. This
is due to the use of aggressive noise reduction in Photoshop, which
reduced the surface detail in the branch and tree trunk quite
substantially; greater care in postprocessing this image could have
mitigated this effect. It’s also interesting to note that
aggressive noise reduction in the bottom image has still left very
noticeable amounts of noise in the lower portions of the image;
advanced noise reduction techniques are described in Part III of this
book.
Finally, just keep in mind that your lens’ diaphram
(i.e., aperture control) constitutes a useful tool for manipulating
backgrounds in images. As you’ll recall from Chapter 3.7, wider
apertures produce a shallower depth
of field (DOF) at a given distance, though increasing the
distance to the subject increases the DOF for a given aperture. A
shallow DOF helps to isolate the subject from its background, often
resulting in somewhat more pleasing backgrounds, but when taken to
extremes a shallow DOF can result in parts of the bird being out of
focus (and remember that a wider DOF can help to mask any focusing
errors that occur due either to poor camera AF or due to limitations in
manual focusing).
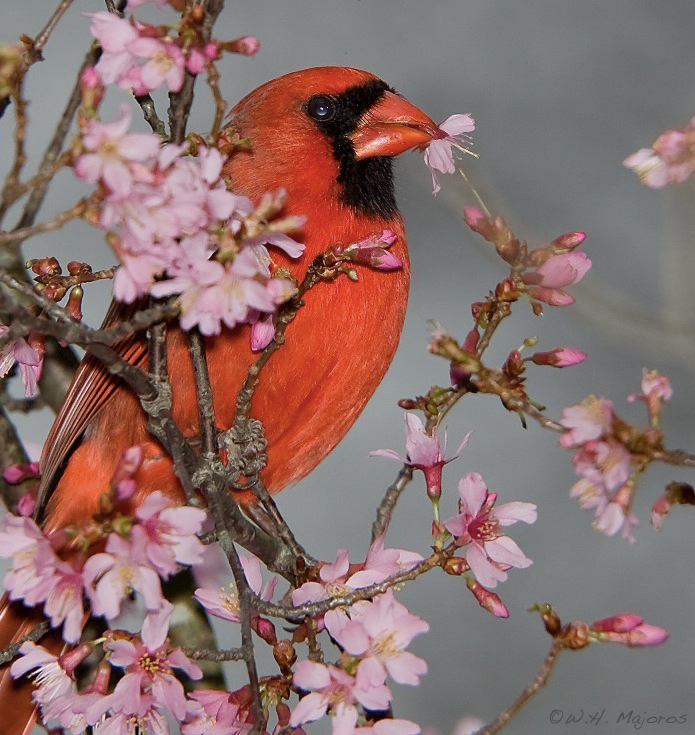
Fig. 9.3.5 :
Though it takes more work and may not pay off immediately,
planting interesting trees and bushes in your yard can result in
long-term
benefits. Anything that bears berries can both attract the birds
and provide
nice scenery for your photos.
|