|
6.10 RAW Versus JPEG
Most serious bird photographers
agree that shooting in RAW is far superior to shooting in JPEG.
Recall that RAW is the native
file format used by the camera, while
JPEG is a compressed format that contains far less information than
RAW. Different camera manufacturers have different proprietary
RAW formats, though Photoshop plug-ins are available that allow direct
loading of RAW images from all major brands.
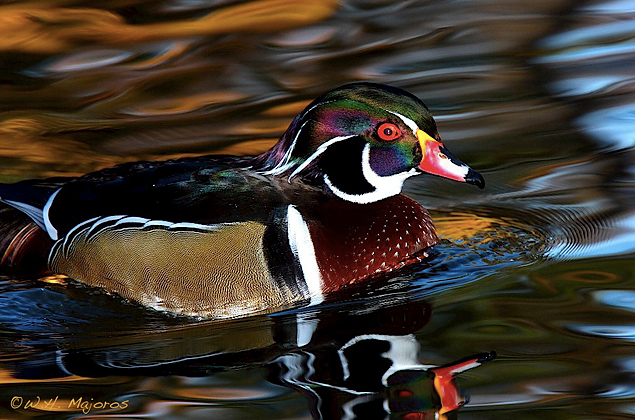
Fig. 6.10.1 :
One of my favorite wood duck images. Although I now shoot
exclusively in RAW, I continually discover older images I’d taken in
JPEG
that still impress me. Though shooting in RAW is very highly
recommended,
if you have to shoot in JPEG it’s not the end of the world.
(1/200 sec, f/10, ISO 640, 560mm, Av with -1.3
EC, TTL flash)
Although RAW is
undoubtedly superior to JPEG in terms of the amount of information that
it retains (which can result in more detail, less noise, and better
color in the final, processed image), there are a few good reasons to
consider shooting in JPEG. First, JPEG files typically take up
far less memory than RAW files. That obviously means that you can
take more JPEG photos before filling up your memory card, or before
filling up your hard drive at home. But it also means that
your camera’s buffer should be able to fit more JPEG’s in it before
filling up. Recall that the buffer is necessary because photos
can generally be taken faster than they can be written to the memory
card. The buffer thus allows you to take rapid sequences of
photos (e.g., using continuous drive mode) without having to wait for
each photo to be written to the card before the next photo can be
taken. However, if you fill up the buffer during shooting, then
you will have to wait for it to empty (at least partially) before you
can resume shooting. This is actually a very common occurrence
when
shooting birds in flight in continuous drive mode when shooting
RAW. By switching to JPEG, you should be able to take longer runs
of photos before filling the buffer, and for some cameras (and cards),
it may be
possible to continue shooting indefinitely (until the memory card is
full).
If you do shoot in JPEG, there are a number of
additional settings that you’ll need to make in your camera before you
begin shooting. Since the process of making the JPEG file
involves throwing away some information from the actual image captured
by
the camera, various processes such as sharpening
and noise reduction
are best performed at this time (during conversion to JPEG, inside the
camera) rather than later during your normal postprocessing of the JPEG
files. Because the actual sharpening and noise-reduction
algorithms used by a particular camera model may be unique to that
model, you’ll need to experiment with different in-camera processing
settings to find what works best for you. For example, you may
find that it’s best to apply only a small amount of sharpening in the
camera, and then to apply more sharpening later in Photoshop. Or
you may find that the camera’s noise reduction algorithm is overly
aggressive, and tends to remove too much detail in the image.
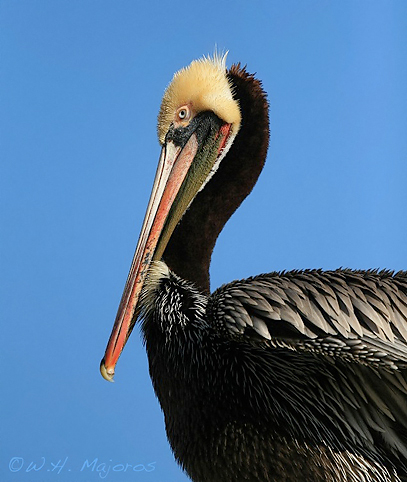
Fig. 6.10.2 :
Another of my favorite images shot in JPEG.
This image was shot on an 8 MP pro-sumer camera, in
JPEG, with a 400mm f/4 lens hand-held. Far more luck
than skill was obviously involved in this particular case!
(1/6400, f/4, ISO 400, 400mm, Av with -1/3 EC)
One other
option that has recently emerged is sRAW,
or small RAW. This
file format retains some of the advantages of RAW while resulting in
much smaller file sizes. For example, sRAW files are truly “raw”
(like full RAW files) in the sense that they are not sharpened or
subjected to noise reduction in the camera, thereby retaining full
versatility for later processing of the information in the file.
Unfortunately, the sRAW files contain less information than full RAW
files, and for this reason they do not appear to be at all popular
among
wildlife photographers.
|
|
|