|
3.9 Cleaning
Lenses
While
cleaning the imaging sensor of a DSLR is a tricky business, cleaning
lenses is a snap. The tools are cheap, and can be easily carried
into
the field. In fact, I typically only clean my lenses in the
field,
during a lull in the activity. I clean my lenses using a simple
four-step procedure. Any of the later steps of the procedure can
be
omitted if the earlier steps were successful at completely cleaning the
lens.
The steps are:
1. Blow off loose dirt with a
rubber blower
2. Brush off remaining dirt with a
brush
3. Wet-clean using a safe cleaning
fluid
4. Remove remaining smudges with a
microfiber cloth
We’ve already encountered rubber air blowers in section 2.8. The
figure below shows the Hurricane
Blower in action. Note that while cheap rubber blowers are
not recommended for cleaning imaging sensors (because they usually
don’t have a filter to keep dust out of the air stream), they should be
safe for most optics.
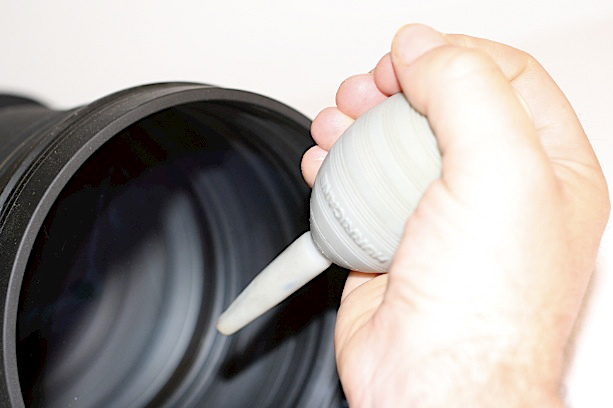
Fig. 3.9.1:
Blowing loose particles from a lens using
a rubber air blower. Rubber blowers are small,
cheap, and easy to keep with you in the field.
Some people just blow on their
optics using their mouth. The problem with that is that you can
get saliva on the glass. Rubber air blowers are small and
lightweight, and therefore easy to carry into the field. But they
only blow off dust that’s loosely adhering to the glass.
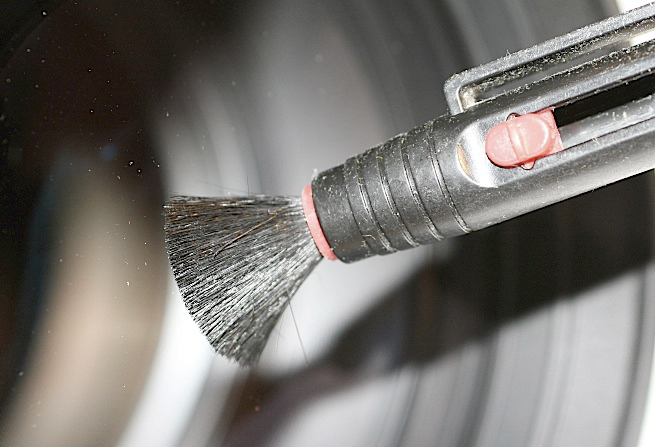
The next line of defense is the lens brush.
The (very dusty) brush shown below is actually one end of a Lens Pen;
we’ll discuss Lens Pens in a moment. The brush obviously allows
you to loosen up dirt particles that won’t come off with just the air
blower. After applying the brush, another round of blowing with
the rubber blower helps.
Fig. 3.9.2:
Loosening particles from a lens
surface using a lens brush. After particles
have been loosened, another pass with the
rubber air blower can be useful.
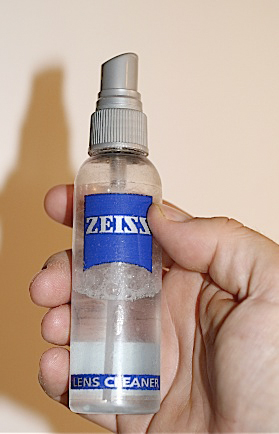
For dirt that won’t come loose
during brushing, a lens fluid is useful. I use Zeiss Lens
Cleaner, which is cheap and effective. Whatever you use, just
make sure it’s made by a reputable manufacturer, and that it’s
guaranteed safe for coated
optics. Recall from section 3.3 that many
lenses are coated with
a clear, antireflective coating, which can significantly improve light
transmission and contrast. I’ve personally damaged optics in the
past by using a lens cleaner not specifically designed for coated
optics. Since Zeiss makes world-class binoculars and camera
lenses, I trust them to make safe lens cleaners.
Fig. 3.9.3: My
favorite lens-cleaning fluid:
Zeiss Lens Cleaner. It’s both affordable and
effective. Use only lens fluids made by
reputable companies and guaranteed not
to damage lenses with optical coatings.
It’s very
important that you do not spray the lens cleaner directly
onto the lens glass! I did this once on my Sigma 800mm lens, and
found that the fluid that had run to the edge of the glass and had
seeped through to the inner space behind the objective lens element,
causing the inner surface of the len to completely fog up.
Unfortunately, a beautiful Common Yellowthroat (Geothlypis trichas) showed up just
as I noticed the fogging of the lens. Here’s a photograph of the
bird taken through the fogged lens:
Fig. 3.9.4:
Common Yellowthroat photographed through fogged lens.
Spraying lens fluid directly onto a lens can result in internal fogging,
which can be very difficult to remove. Instead, spray onto a cloth
and then apply the wet cloth to the lens.
It’s remarkable that the image came out as well as it did, considering
that the objective lens was totally fogged up. I’ve spoken to
other photographers who say that a lens can accumulate quite a bit of
filth without noticeably affecting image quality; apparently, dust or
water droplets on the objective lens (on either side) are generally so
out-of-focus that they are virtually never visible in images.
Their effect is probably to scatter light rays so as to reduce overall
contrast. For this reason, I don’t bother wet-cleaning my lenses
when they get a little dirt on them; I wait until it builds up enough
that I think it might begin to affect image quality.
Instead of spraying the cleaning fluid directly onto the
glass, I now spray it onto a microfiber cloth, and then use the wet
cloth to clean the lens. The cloth doesn’t need to be microfiber
for wet-cleaning, but that’s what I keep with me in my photo vest, so
that’s what I use for wet-cleaning too. I wipe from the center of
the lens outward toward the edge. This pushes all the filth out
toward the margin of the lens, where it’s less likely to affect optical
quality. Then I wipe around the edge to remove as much of this
accumulated filth away as possible.
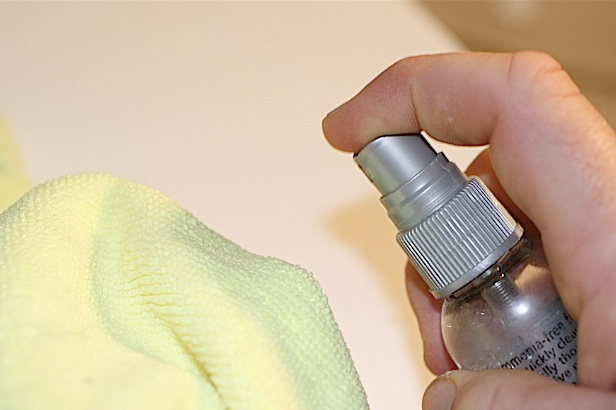
Fig. 3.9.5:
Using a microfiber cloth for wet cleaning.
Microfiber cloths are now extremely cheap, and highly
effective for both wet and dry cleaning of lenses.
The microfiber cloths that I use (such as the one
shown above) are the ultra-cheap kind that you can get at Wal-Mart in
the automotive
. I did at one point buy an expensive Kodak
microfiber lens cloth, but I never use it anymore. The Wal-Mart
ones are better, larger, and cheaper. They’re the size of a
wash-cloth and come in packs of five. They’re truly
amazing. If I accidentally touch a lens and get a fingerprint on
it or notice some other smudge on the lens, I just rub it off with the
microfiber cloth (if I’m sure there are no abrasive particles on the
lens or cloth that might scratch the lens).
Before switching to microfiber cloths, I used to use
Kodak lens paper, which comes in packets of 50 or so, and can be
expensive unless purchased in bulk. The figure below shows a
single sheet of this paper. The lens paper is intended for wet
cleaning, but I’ve always found it to leave streaks on my lens.
The moistened microfiber cloth leaves some streaks also, but generally
fewer, in my experience.
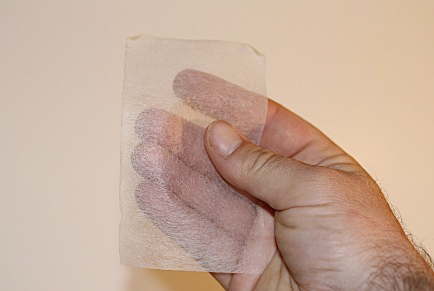
Fig. 3.9.6:
Kodak lens paper: the old standard
for wet-cleaning of lenses, now largely supplanted
by cheaper and more effective microfiber cloths.
Finally, a popular method for dry-cleaning of lenses
is the Lens Pen, which is shown below. One end of the pen is a
brush, as already shown above. At the other end is a special
surface that makes use of a dry, carbon-based cleaning agent that gets
re-applied to the applicator every time you replace the cap (not shown
in the figure).
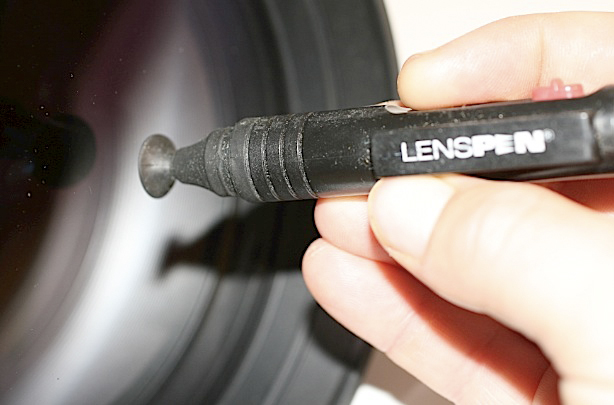
Fig. 3.9.7:
Dry-cleaning a lens with a Lens Pen.
|
|
|