|
16.2 Building a
Custom Web Site
While the mass-market, “pre-canned” photo-hosting solutions are a
great way for beginners to
start sharing their bird photos on the internet, at some point you may
decide that you’d really like to have more control over the
presentation of your digital portfolio. For example, you
might be very picky about the layout of your digital “gallery”, in
terms of the geometry or background colors of the web page,
the way different images in a gallery (or even different galleries) are
displayed relative to each other, or even just the resolution and
scaling of the full-sized views of individual photos.
Artistically, it’s quite natural to want to control every aspect of the
viewing experience enjoyed by your gallery’s visitors, and to the
extent that you feel you have a unique and artistically satisfying “vision” for a given collection of images,
it’s worthwhile putting in
the effort to realize that vision for the viewer’s benefit.
Although some photo-hosting sites do allow for some
degree of customization of individual photographers’ web pages, you’ll
typically have to upgrade to a “premium” (i.e., non-free) account in
order to take advantage of those options. In some cases, the
range of options for predefined “page styles” may meet with your
satisfaction, and if the associated hosting fee and other
considerations (whether practical or artistic) are satisfactory, then
you may indeed consider yourself lucky and decide on that particular
solution. Just keep in mind that not all media-hosting sites stay
in business indefinitely, and even those that do survive over the long
term may impose changes in account-holder agreements and/or limitations
that you might eventually find unacceptable.
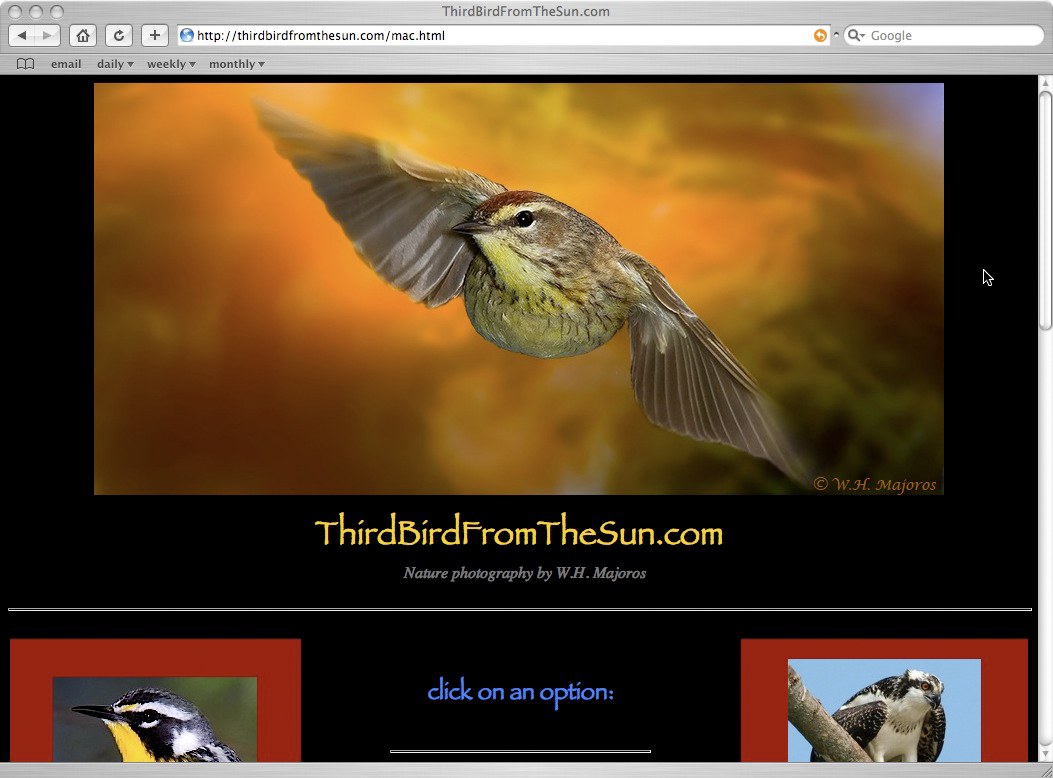
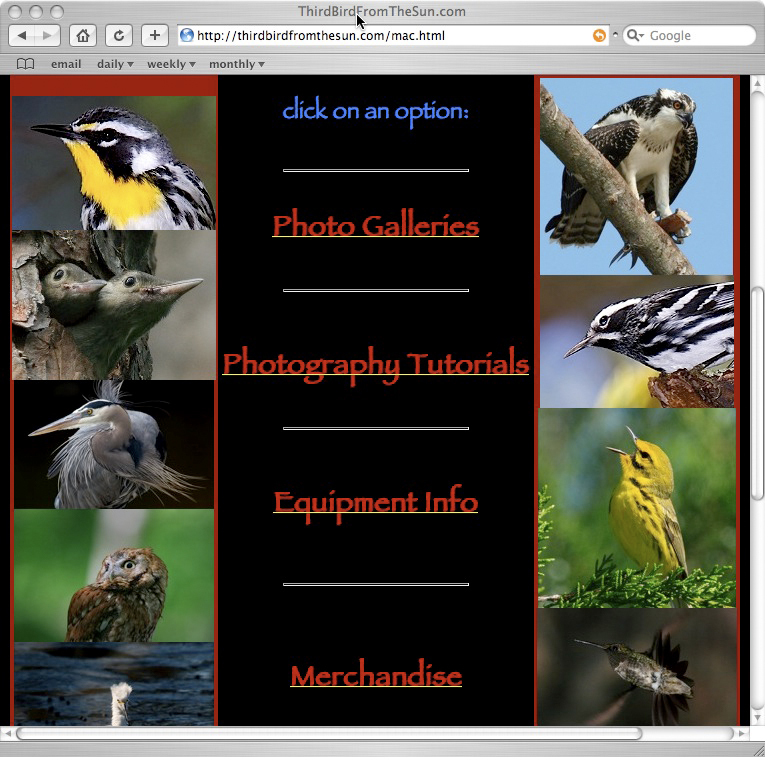
Fig. 16.2.1 :
My personal bird-photography web site. At the top is the banner
and the web site title; below this is the main menu (largely invisible
here). I’m
constantly thinking of ways to improve the visual appeal of my online
gallery.
With a do-it-yourself web site, you can change the appearance in any
way you want.
The other option is to build your own web site from
scratch, and while that may sound like a lot of work (which it is),
most serious photographers seem to end up adopting this solution
eventually.
Note that while this solution is not trivial to implement, it needn’t
be expensive, and indeed it can be cheaper than using a
pre-canned solution, in some cases. In this section we’ll
consider
the main issues involved in the do-it-yourself route to
online photo hosting.
16.2.1
Choosing a Hosting
Company
The first thing you need to do is to pick a domain name. This is the web
address (“URL”) for your main web site.
Two popular options are to use
something like “yourname.com” (i.e., “JaneDoe.com”, but with your name
substituted in place of Jane Doe), or to coin a catchy site name and to
use that. For example, my personal web site (which I use for bird
photography as well as other uses) is BillMajoros.com, while for my
bird photography I chose the name ThirdBirdFromTheSun.com, since the
phrase “Third Bird from the Sun” is catchy and therefore easy for
people to remember. Try to brainstorm a list of possible
domain names, including both of the above types (i.e., those based on
your name, and those based on a catchy bird-oriented or
photography-oriented phrase). You’ll then want to check which of
these domain names are available
(i.e., which haven’t already been taken by other people). You can
do this easily at any number of domain-registration
sites; one reputable registrar is NetworkSolutions.com.
Note that you can use any of these domain “registration” sites to check
for domain availability; just querying domain availability doesn’t cost
anything, and you don’t have to register the site you
want through the company that did the search for you (that is, you do need to register the site you
want with some registrar, but
it needn’t be the same
company who did the search for you to determine availability).
Domain name registration typically costs in the $10 (US) range, give or
take a few dollars, and it needs to be renewed every year (generally at
a comparable price).
In addition to selecting a domain name, you need to
select a web hosting company.
This is the company that provides the actual storage space for your
site, as well as the hardware and software that “serves” the site to
browsers over the internet. Hosting plans typically run $5 to $10
(US) per month, which is extremely reasonable considering that such
plans typically provide far more space and bandwidth (monthly upload/download
quota) than you’re ever likely to need for a bird photo website.
For example, as of this writing my current provider (IPOWER.com) offers
unlimited disk space and unlimited bandwidth for
$5.95/month for a 1-year commitment, or $6.95 for a monthy
commitment. These prices often change, however, so be sure
to check the hosting company’s web site for current pricing.
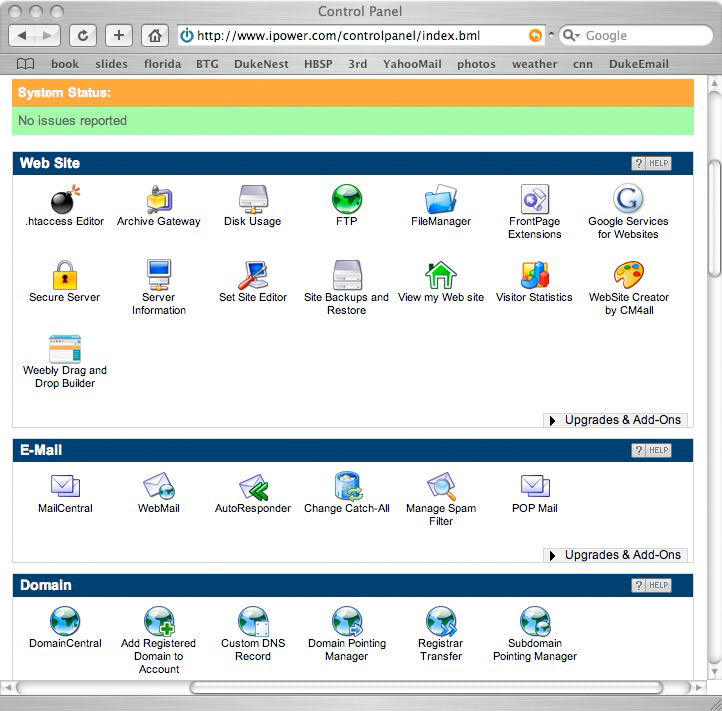
Fig. 16.2.2 :
My current hosting company’s main web page.
Don’t be fooled by the hype.
Once you’ve found an available domain name and a
hosting package that you like, you can register the domain through your
chosen registrar when purchasing their hosting plan.
They’ll typically charge you separately for the domain registration and
the hosting plan; some hosting plans include one free domain
registraiton, though yearly renewals of the domain name will
incur an additional cost. Note that registering your domain name
through your hosting company is generally the best option; though you
can certainly register the domain name through a different company,
getting your hosting company to do the registration generally
simplifies things, since the hosting company can internally coordinate
the registration and IP/DNS pointing of the domain (don’t worry if you don’t know what that means).
Apart from quota
limits (i.e., how many gigabytes-worth of files you can store,
and how many gigabytes can be transferred to viewers, per month), there
are some other differences between hosting companies that you should be
aware of. The first is ease of
use (for you, not your visitors). Unless you happen to be
a computer scientist like me—and possibly even if you are—it’s
likely that you’ll want for your hosting company to provide an
intuitive interface for common maintenance issues such as backups, domain/subdomain pointing, and access statistics. The
hosting company that I use provides a web-based “control panel” that
provides some of these functions (see the figure below).
Fig. 16.2.3 :
The control panel for my web hosting account. The only feature
I use with any regularity is the Visitor Statistics report.
Although
graphical user interfaces like the one shown above can be useful for
some tasks, the actual designing of web pages and uploading of photos
to the host server is typically easier when done using other tools, as
we’ll
describe shortly. I generally only use my host’s web-based
interface when checking available disk space and bandwidth, collecting
visitor statistics, or managing subdomains. Regarding disk space,
most hosting plans these days provide a ridiculously large amount of
disk space, so it’s generally not an issue even if you plan to upload
many, many thousands of photos; I have thousands of bird photos on my
web site and they only take up about 6 gigabytes (GB) total. So
far I also haven’t had any issues with bandwidth—the amount of data that
can be uploaded or downloaded per month—since photos resized for
viewing on a web page are typically very small (~200 kilobytes on
average, where 1000 kilobytes = 1 megabyte, and 1000 megabytes = 1
gigabyte) and bandwidth limits are
typically very large (say, 250 GB per month).
Most hosting companies will also provide a way for
you
to see your site’s monthly access satistics—i.e., how many people
came to your site this month, how many web pages they viewed, how many
images, and even which pages and images were accessed most. This
can be very useful if you’re thinking about trying to sell some of your
photos, or to enter them into photo contests. Just keep in mind
that download statistics can be misleading: an image may be viewed more
frequently than others simply because someone posted a link to it
somewhere on the internet, and many other people followed that link;
that doesn’t necessarily mean that that particular photo is the one
people like most in your portfolio.
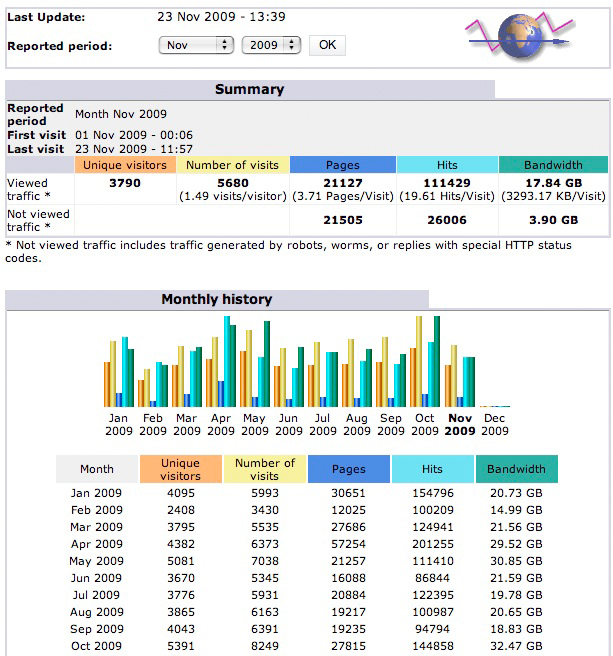
Fig. 16.2.4 : A
small portion of the Visitor Statistics report for my web site.
The rest of the report (not shown) goes into great detail about the
types of
files most frequently downloaded, the names of those most popular files,
the search engine phrases most often leading to a visit, and even the
operating system and browser version statistics of visitors.
Stats can
be viewed on a per-month basis, but are continuously updated.
One very
important consideration when choosing a hosting company is the
reliability of that company’s service. If the company’s servers
often crash, then you may find that your web site is often inaccessible
to people who want to view it. When the servers crash, it may be
hours or even days before your web site is visible again. Even if
the servers don’t crash very often, they may be overloaded by too much
traffic, resulting in web pages that load very slowly. Internet
users these days have little patience for slow web servers, so if you
get stuck on a slow server, you may find that people spend very little
time at your site. I’ve had a number of cases in which I couldn’t
upload a large number of photos because the servers kept dropping the
connection after the first few photos were sent, and I was told by
customer support that the server was simply overburdened by other users
who shared the server I was on.
A related issue is the competence of the hosting
company’s technical support staff. Although the hosting company
that I use claims to have exceptionally competent staff (“experts in
the industry” is what their web site
proclaims), I can say with
absolute certainty that many of them are substantially less competent
with a computer than my 13 year-old labrador retriever. Many of
the customer support staff are located overseas in call-support centers
where they don’t even have access to the servers or the engineers who
keep the systems running. I strongly recommend spending some time
browsing around in internet forums, reading comments from actual users
of various hosting companies, to find out which companies have the
highest server “up-time” and the most competent support
staff.
16.2.2
Creating HTML Pages
Web pages on the internet are encoded in a computer language called HTML. You
don’t really need to know this language in order to
create web pages, though it doesn’t hurt to know a little bit about
HTML if you’re thinking of building your own web site from
scratch. Later in this section we’ll cover some of the basics of
HTML.
Today, most web pages are created not by writing
HTML directly, but by using a visual web page editor that writes the
HTML for you. I like the Composer
program that comes with the Mozilla
package, which is completely free (see the Seamonkey product from mozilla.org). A
screenshot of Mozilla’s composer program is shown
below; this program is available for most common operating systems and
platforms (including Mac and Windows). Other programs for
composing web pages are available, such as Microsoft’s “Expression”
program; some versions of Microsoft Word also support web-page editing.
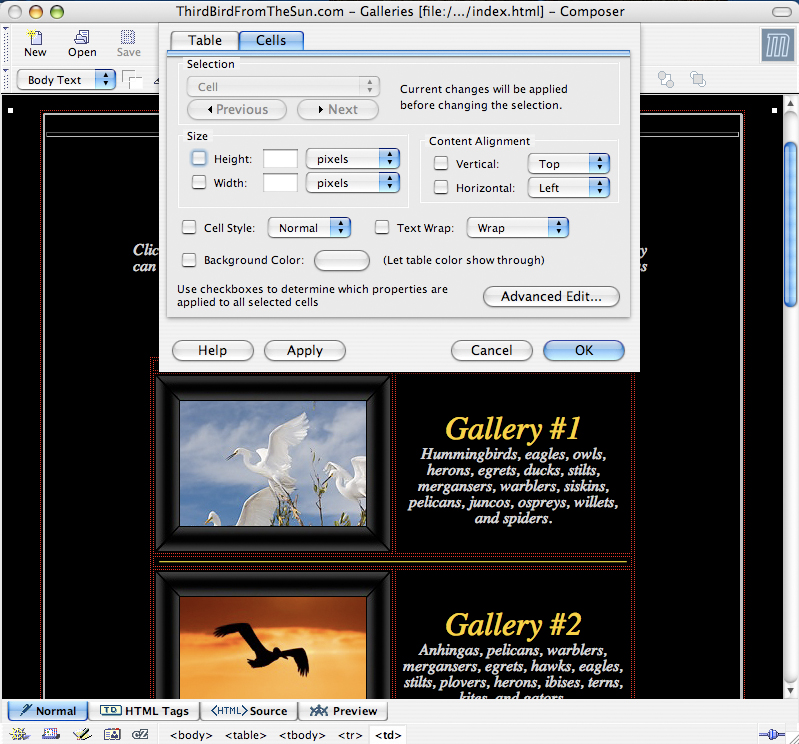
Fig. 16.2.5 :
The “Composer” program in the
Mozilla suite (now available as
part of the Seamonkey project). This editor is completely free,
and is what I’ve
been using for editing web pages for the past 8 years or so.
Everything is done
visually, via drag-and-drop. Tables (red dotted lines in this
figure) allow you to
organize content. Inserting images and links to other pages is a
snap.
In the example
shown above, I’ve created a web page visually, in Mozilla Composer, by
creating several nested tables
(indicated by the red dotted lines) and populating the cells of those tables with Images
And Words. As shown in the figure, you can easily set various
properties of tables and their cells, such as the spacing, alignment,
and color. None of this requires knowledge of HTML. For the
images, you can simply drag-and-drop them (in JPEG format) from a
folder on your computer
into the web page; you can then type in the accompanying text and
adjust the font size and color via visual controls in the Composer
program.
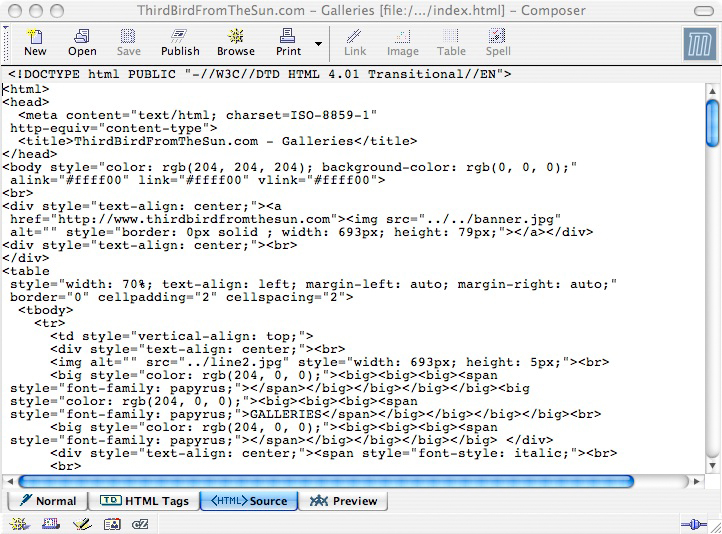
If you do happen to know a bit about HTML (or don’t
mind learning), Composer also allows you to edit the HTML directly, as
shown below. In this case I’ve designed a web page visually using
the user interface of Composer (i.e., without actually writing any HTML
by hand), and then clicked on the “HTML Source” tab, which causes
Composer to show the HTML that it has generated for the page; you can
then edit the HTML directly, if you like.
The HTML then needs to be saved into a file on your computer and
then uploaded to your hosting company’s server; note that any photos
displayed on the page have to be uploaded separately, since they’re not
actually embedded in the HTML file (the HTML source code simply “points” to the file by specifying its
location).
Fig. 16.2.6 :
Mozilla’s “Composer” program in
HTML source mode.
The source shown above was generated by Mozilla from the visual
layout that I designed using drag-and-drop operations (with the mouse).
A complete
tutorial on HTML programming is obviously beyond the scope of this
book; we’ll just briefly touch on some of its features. First, an
HTML file consists of both text
and markup; the former is
simply any text that you want to be displayed on the web page, while
the latter consists of special tags
that control the layout of the page and can also be used to display
photos. Each tag is delimited by greater-than and less-than
symbols, as in <h1> or <p>. Most tags come in pairs,
such as <b> and </b>, in which case the <b> tag
begins an HTML element and the </b> ends that element. Any
text sandwiched between a <b> and </b> will be displayed in
bold font, while
text between an <i> and an </i> will be displayed in italics. Top-level headings
can be specified using <h1>...</h1>, slightly smaller
headings by <h2>...</h2>, etc. Images can be
displayed using the tag <img src=“filename.jpg”>, which doesn’t
have an end tag (i.e., no </img>). To create a link to
another web page, you can use the <a href=“other_page.html”> tag,
which does require an </a> tag; the text between the <a...>
and </a> tags will comprise the link to the other page. If
you’re interested in learning HTML, there are any number of tutorials
available on the internet; a good place to start is the Wikipedia entry
on HTML, which lists several tutorial links at the bottom of the page.
If you happen to be a computer programmer, then
you’ve no doubt considered the possibility of writing your own custom
software for generating web pages to display your photo albums. I
use the programming language Perl
for this purpose; Perl is a popular scripting language available on
virtually all UNIX-based systems (including Mac OS X, which is built on
UNIX), as well as some others. I have one Perl script, for
example, which reads a directory containing bird photos and then
generates a web page containing links to those images. This
script is shown below (in part), in the UNIX editor emacs:
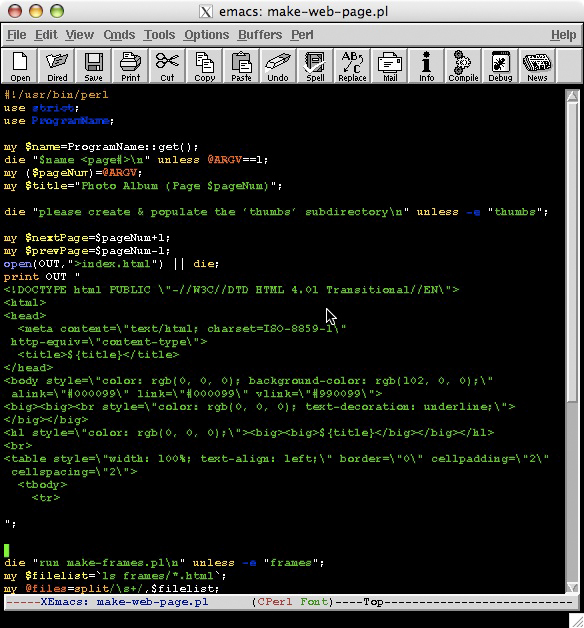
Fig. 16.2.7 : A
Perl script for generating an HTML-based photo album.
If you know how to write computer programs in any language, that can be
useful for building a pipeline for generating photo album web
pages. In my
system, all I need to do is populate a computer directory with image
files, and
then run several of my Perl scripts to create the thumbnails, generate
a set of
slideshow files, and assemble a gallery page. I also have Perl
scripts for
converting images from Mac to Windows, and for uploading to my server.
I have separate
Perl scripts for generating image thumbnails,
for making what I call frame files,
and for converting image gamma
settings between the native Windows and Mac settings. Thumbnails
are the small, icon-sized versions of photos that serve as
place-holders on the web page; when a user clicks on a thumbnail, the
larger version of the photo would then be displayed.
When displaying that larger version, I link to a special frame file rather than linking
directly to the image itself. The frame file is simply an empty
HTML file that contains nothing but the full-size image; I prefer to do
this because on some systems it will prevent the users’s browser from
resizing the image to fit inside the user’s browser window, which can
sometimes degrade image quality due to the browser’s crude image
resizing algorithm. The issue of gamma conversion will be discussed
in section 16.2.4.
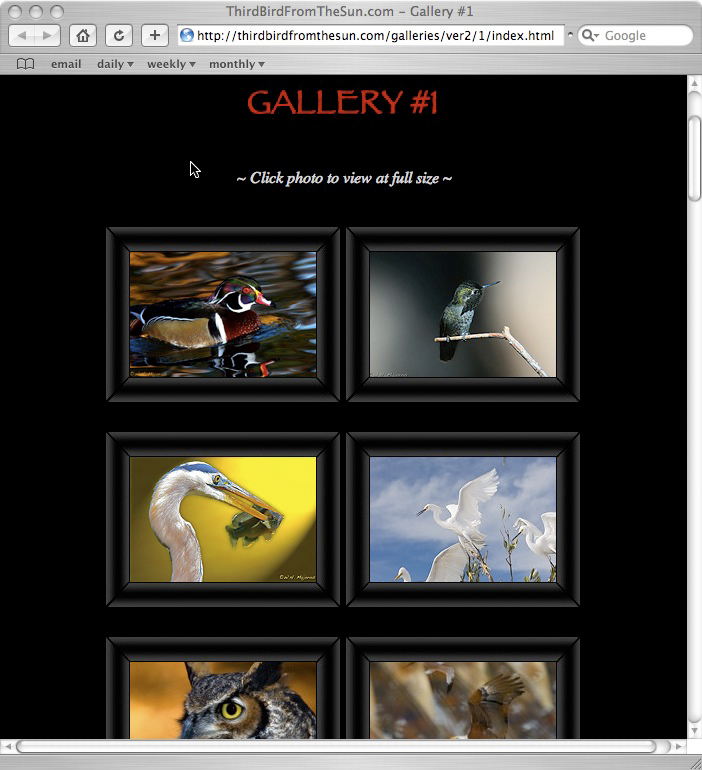
Fig. 16.2.8 :
Thumbnails in a photo gallery. When the user
clicks on a thumbnail, the browser displays a full-sized version
of the image. Choosing the thumbnail size, the background
color for the page (black here), and the spacing and overall
layout are some of the artistic decisions that have to be made
when designing a web site from scratch.
16.2.3
Site Organization
Once your portfolio reaches a certain size, you’ll want to begin
organizing it into a coherent structure that viewers will find
convenient to navigate. There are a number of different ways to
do this. For example, some birders organize their photos by
species, while others list their photo albums by date. I don’t
favor the by-species option,
since it tends to result in individual photo albums that have lots of
very similar-looking photos, resulting in some degree of
monotony. Instead, I organize my online photos into two main
groups: a “trophy case” of my hundred or so all-time best
photos, and a
separate index of photo albums organized by date (typically according
to individual photography trips).
Fig. 16.2.9 : A
portion of the top-level menu for my web site.
The topmost option takes the user to the list of photo galleries.
The bottommost option takes the user to the part of my site that
deals with sales of prints and canvases. The bird images along
either side are purely for decoration, to help make the menu
“come alive”.
In addition to
an index of photo albums, you might consider having a top-level menu
that offers links to pages containing contact information, a personal
biography, equipment info, and any merchandise (such as framed prints
or canvases) that you might have for sale. A biography can be
useful for giving your viewers a “mental hook” for them to associate
with your work (i.e., helping them to remember your work by remembering
something about you). Including equipment information can help to
increase traffic to your site from users with similar equipment who
perform an internet search based on camera or lens models. In
terms of merchandise, if you’ve set up a print-on-demand account with a
company such as ImageKind or SmugMug (see section 14.4),
then you can
simply link directly to that page from your main web site.
Another thing I recommend, to increase public
interest in your photo albums, is to invest the time to annotate your
photography with some meaningful text. If you group your photos
together according to some theme—such as location, or
species—you can then add some narrative describing how you obtained the
photos, or describing the species pictured, or the site where they were
photographed. Such text can be enormously useful in attracting
viewers to your site, because it will be indexable by search engines,
and will also provide an additional reason for some viewers to visit
your site. In fact, I believe the more text you add to your photo
albums, the greater your chances of attracting significant attention to
your photography. The text
can consist of anything from artistic essays or poetry to blogs and
diaries to reviews of equipment and/or birding sites. Literally
anything that might attract attention to your photo album is fair game,
when it comes to attracting the denizens of the internet to your
site. In a deeper vein, textual annotations increase the
intellectual value of your site by increasing the information content
and turning what would normally be just a random collection of JPG
files into a living, breathing, real person’s narrative about life in
the company of wild birds (or whatever you decide to write
about).
Note that once you’ve set up a hosting account for
your bird photos, you’ll typically have lots of space left over on your
account for hosting other web pages; these other pages can even have
their own domain names associated with them, since your hosting
provider can point those domain names at subdirectories of your hosting
account. For example, this book, which has as its domain name digitalbirdphotography.com, is
hosted on the same account as my personal web page, billmajoros.com. Also on this
same account is the domain for my biotechnology textbook (at geneprediction.org/book), the
domain for a DNA analysis software package of mine (genezilla.org), and of course my
bird photos (thirdbirdfromthesun.com,
which is currently aliased as birdpixels.com).
16.2.4
Platform Issues:
PC, Mac, and Gamma
It’s an unfortunate fact that images processed on one platform (such as
Windows) can appear quite different when viewed on another system (such
as on an earlier-generation Apple Macintosh). In
particular, images processed on an older Macintosh will
tend to look unnaturally dark when viewed in Windows, while images
processed on a Windows computer will tend to look “washed out” (i.e.,
too light) when viewed on the older Mac. The reason for this is
something called gamma, which
involves issues related to both hardware and software.
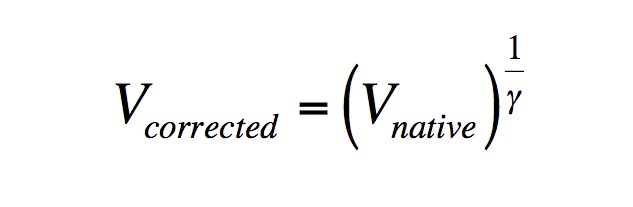
Mathematically, the gamma problem takes the form of
a power law relating image
intensity to applied voltage:

What this equation states is that the pixel intensity (I), as seen
on a computer monitor, is equal to the pixel value (V) encoded in the image file
(0 to 255, rescaled to the range 0 to 1), raised to the power gamma (γ). This nonlinear
relationship between encoded pixel value and rendered brightness is a
consequence of the underlying physics involved in the use of cathode ray tubes
(CRT’s—the predecessors of modern LCD screens) in rendering images;
to maintain backward compatibility, modern LCD screens (also called TFT displays) typically emulate the
gamma characteristics of traditional CRT displays. An example
gamma function is illustrated below. For Windows machines, the
value of gamma is typically 2.2 or 2.5, while for Mac systems (prior to
OS X 10.6, “Snow Leopard”), the value would be 1.8.
 Fig.
16.2.10 : A gamma curve. The x-axis (horizontal scale)
Fig.
16.2.10 : A gamma curve. The x-axis (horizontal scale)
corresponds to the pixel values (1 to 255) given in the image
file, while the y-axis (vertical scale) measures the pixel intensity
produced by the physical display technology (e.g., CRT or LCD).
The exact shape of the curve is influenced by the gamma parameter,
which differs between different types of hardware.
The solution to this problem is to impose a gamma correction, by applying the inverse gamma transform
to the pixel values before sending those values
to the computer’s monitor (which will then apply its own gamma
transform). The combined effect of the inverse gamma transform
and the forward gamma transform is that the displayed pixel intensities
should (ideally) scale linearly with the encoded pixel values in the
original image file, as desired. The inverse gamma transform is
shown below:
You can apply this transform easily using the “convert
-gamma” command in the free, open-source
software package ImageMagick.
ImageMagick is available for all major operating systems, including
Windows and Mac OS X. Photoshop also has a gamma correction
function.
Unfortunately, not only can the
value of gamma vary between systems, but also some systems perform
their own gamma correction prior to sending the image to the monitor
for display; this complicates any strategy for cross-platform gamma
correction of bird photos. The strategy I’ve adopted is based on
an empirical approach. All of my bird photos are processed on a
Mac laptop. Because most web viewers use Windows, my bird photos
would appear unnaturally dark on their screens. So I process all
of my photos by applying the inverse gamma transform shown above (via
ImageMagick), with
gamma set to 1.38888. I determined this value of gamma by trying
different values and viewing the resulting gamma-corrected images on
several Windows computers (including both laptops and desktops with LCD
monitors); the value of 1.38888 was the one which resulted in Windows
images that most faithfully matched the originals when viewed on my
Mac. Note that this gamma value (1.38888) isn’t necessarily the
optimal value for correcting your own Mac-based images, since the ideal
value will be affected by the brightness of your native computer’s
screen.
Furthermore, Macs running the newest version of OS X
(version 10.6, also known as Snow
Leopard) now apply the same gamma transform as Windows machines,
so that an explicit gamma correction may not need to be applied to your
bird photos when posting them to Windows-dominated internet venues.
Systems other than Windows and Mac do exist, most
notably Linux (and other
flavors of UNIX), though at present they seem
to represent a very small percentage of the internet-browsing
population. Many Linux-based systems utilize the same gamma
transform as Windows, so if you’re processing images on a Linux
machine, you may not need to apply any explicit gamma correction before
posting your images on the internet. My personal solution to the
gamma issue is to ask users which system they’re using when they enter
my web site, and to then direct their web browser to a gamma-corrected
version of my site, as per their system. This requires
maintaining two parallel web sites (one calibrated to Windows machines
and one calibrated for Macs), but in practice this hasn’t been much
more than a minor inconvenience. (Note that if the figures in
this book appear unnaturally light or dark to you, then you may be
viewing the wrong version
for your operating system).
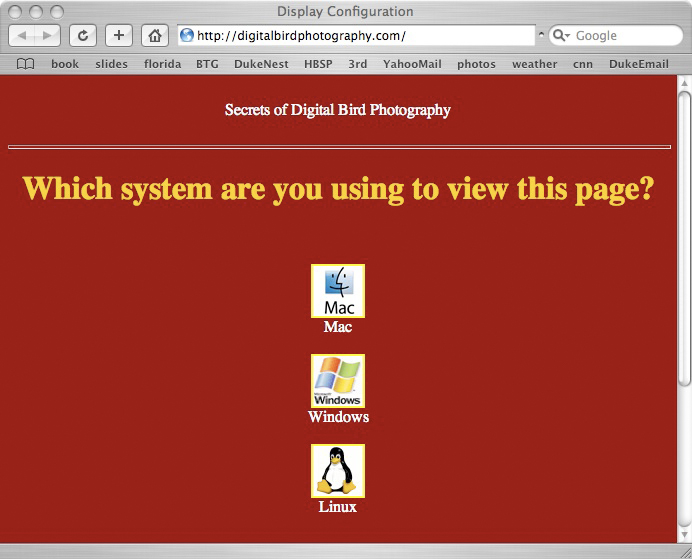
Fig. 16.2.11 :
The initial page of this book asks which system readers
are using, so that images scaled with the appropriate gamma value
can be used; using the wrong gamma for a given system will result
in images that are too bright or too dark.
Note that a gamma correction factor can sometimes be
specified system-wide in your operating system’s monitor profile, or in
your image processing software. Also, web browsers perform their
own gamma correction, which to some degree worsens the problem rather
than fixing it. Fortunately, the convergence of Mac and Windows
gamma values starting with OS X 10.6 should render the problem
increasingly irrelevant in the future.
A somewhat related issue is the use of special
browser plug-ins, such as the popular Flash
plug-in. Savvy web developers like to use flashy plug-ins because
they look sophisticated, but I try to avoid using anything other than
basic HTML, because plug-ins often aren’t available on mobile devices
such as cell phones and tablets.
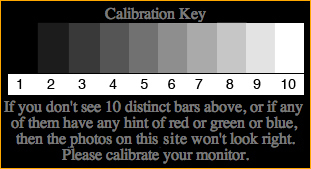
16.2.5 Monitor Calibration Issues
Another unfortunate fact is that not every internet user is viewing
your web site on a properly calibrated display. You should,
however, ensure that your
monitor is properly calibrated, so that others viewing your photos on a
calibrated display will see more or less what you see when you view
your own web site. Also, postprocessing your photos on a
calibrated monitor will minimized the expected bias seen by the average
viewer using commodity equipment. The calibration key below can
be used as a quick check as to whether your monitor is out of
calibration. Section 14.1.2
discusses calibration techniques.
16.2.6
Making Web
Slideshows
Making a slideshow on the web is simple. The way I do it is to
have a separate HTML page for each image, and to link each HTML page to
the next. The code to do this is:
<html>

   <body style="background-color: rgb(0, 0, 0)">

      <center>

         <a
href="next_page.html">


<img src="this_image.jpg">

         </a>

      </center>

   </body>

</html>
The rgb(0,0,0) sets the page color to black, the <center> tag
causes the image to be centered horizontally on the screen, the <img
src...> specifies the image to be displayed on the current page, and
the <a href...> tells the system that clicking on the image
should cause the next page (with the next image) to be loaded into the
browser. Writing a computer program to automatically generate
these pages for a set of images in a directory is simple. It’s
a good idea to provide some instructions to the user on the very first
page,
so s/he knows how to get from one slide to the next, as illustrated
below.
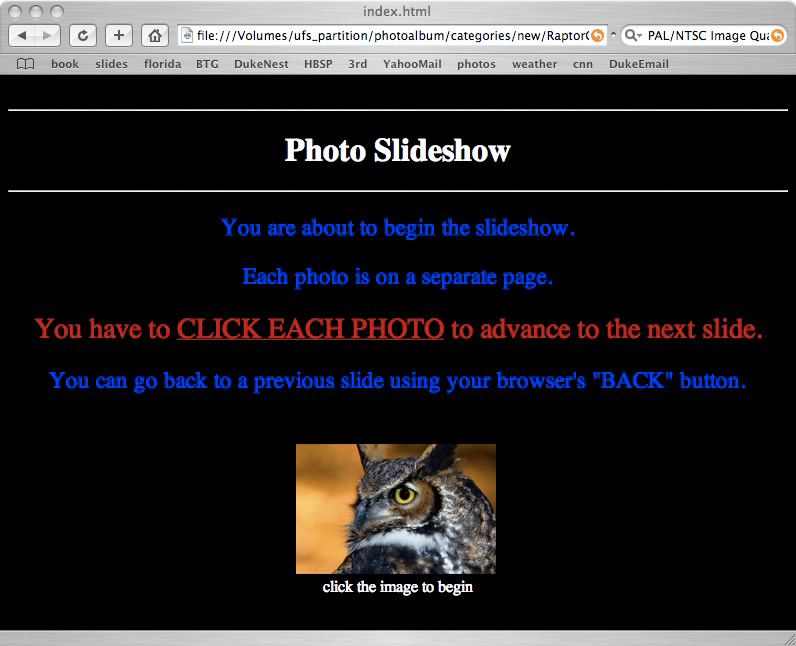
Fig. 16.2.12 :
The top-level page for a slideshow on my web page.
It’s good to have a top-level instructional page to tell users how to
navigate through the slideshow. It’s also good to explicitly tell
users
that they need to click on the thumbnails to view images at full size.
I actually had a professor complain that the images on my site were
“too small”, until I
explained that those were only the thumbnails!
16.2.7
Avoiding Copyright
Infringement
It’s worth mentioning very briefly the issue of copyright. There are two
issues: making sure you don’t violate anyone else’s rights, and making
sure nobody violates yours. In terms of the former, the main
issue is the use of other people’s images on your web page. This
most commonly comes up in the use of icons. For example, in your
top-level menu you might want to use a Tweety Bird icon for the link to
your bird gallery, and perhaps a Scooby Doo icon for the link to photos
of your dog. These icons are easy to find by searching through
Google Images, but just because you can find them on the internet
doesn’t mean that using them isn’t a violation of the copyrights for
those images.
In terms of your own images, it’s a good idea to
place a copyright notice on your web site to protect your own
rights. In the U.S. (and some other countries), you don’t need to
do anything special to obtain copyrights for your own images; you
implicitly own the copyright as soon as you create the image.
However, explicitly registering your photos with the copyright office
provides more legal protection, since it provides proof of
ownership. Refer to the copyright office in your country for
specific information on copyright laws. Note that explicitly
registering images with the copyright office typically involves a fee,
and can take months to complete.
As we’ll see in Chapter 11, adding a copyright
notice to each of your images via Photoshop is simple, and needn’t
interfere with
the aesthetics of the image (if done properly).
References for this section
- Stanford
Computer Graphics Laboratory [http://graphics.stanford.edu/gamma.html]
- Gamma
FAQ, by Charles Poynton.
[http://www.poynton.com/notes/colour_and_gamma/GammaFAQ.html#gamma]
|
|
|